

|
|
|
|
|
WEB OPAC HELP ::Malay Version::
[Main|Basic Search|Advanced Seach|Buletin|Help|About]
CONTENT
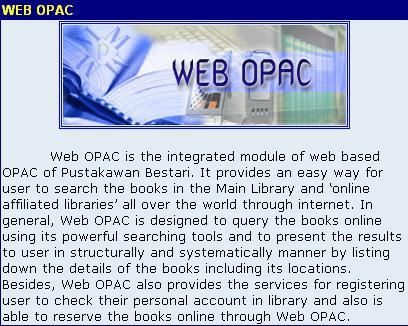
Web OPAC is the integrated module of web based OPAC of Pustakawan Bestari. It provides an easy way for user to search the books in the Main Library and ‘online affiliated libraries’ all over the world through internet. In general, Web OPAC is designed to query the books online using its powerful searching tools and to present the results to user in structurally and systematically manner by listing down the details of the books including its locations. Besides, Web OPAC also provides the services for registering user to check their personal account in library and also is able to reserve the books online through Web OPAC.
The main purpose of Web OPAC in its operations is to assist the user to perform book searching in the Main Library or online library via internet. The searching could be done by various method, either based on the book’s title, author, vendor, calling number, ISBN/ISSN, subject’s title or simply provide all the listed attributes. There are two types of searching namely ‘Basic Search’ and ‘Advanced Search’. Both diagram 1 and 2, respectively shows the interface for the equivalent searching types.
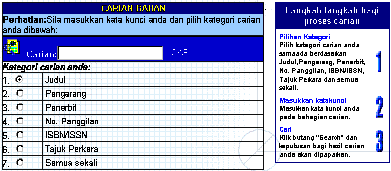
Basic Search
There are three basic steps in performing the Basic Search:
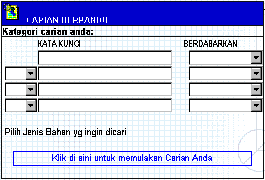
Advanced Search
There are approximately seven steps to be followed in order to successfully perform the Boolean Search:
Having completed the searching processes, the system will display the result which is including ‘Hits’ number based on the keywords which have been entered as per diagram 3 below.
Next, click ‘Term’ button where the system will proceed to display the search listing based on the ‘Hits’ counter (as per diagram 4) . On the screen, it will display the Book’s Title with its Calling Number, based on the query made. Then, user can click either ‘Title’ or ‘Calling Number’ in detailing the listed books.
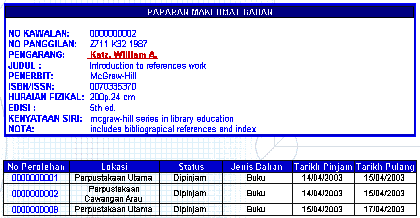
Below is the sample diagram showing the result from searching process and the list of books with its location. For instance, if you think of finding books with similar author which are currently being displayed on the screen, click on the ‘author’s name’ link and the new searching process will take place, and the result will appear as soon as searching is completed.
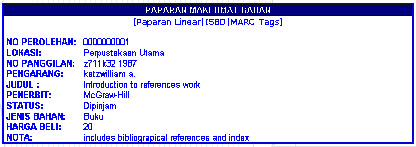
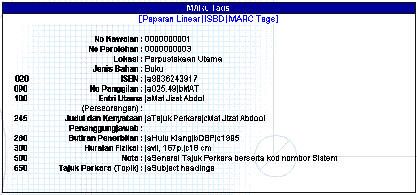
To see the details of selected books based on its Calling Number and Location, click the ‘Assession Number’ button. Having clicked the button, the system will display the relevant information with three type of views, ‘Linear views’, ISBD and MARC Tags. Diagram 5, 6 and 7 respectively shows the equivalent images.
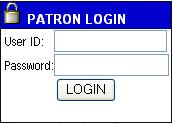
Registered User has to provide the credentials such as User ID and Password in order to get access to advanced steps/ sub-modules such as User Status Checking, Basic Search, Boolean Search, Bulletin, Account Screen, Password Change and About Pustakawan.
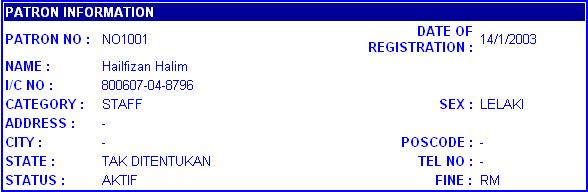
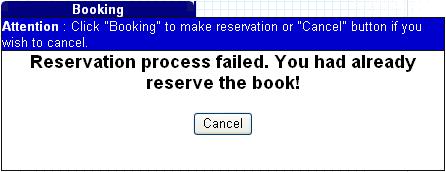
Both user types, unregistered and registered user, respectively are able to use the Basic Search. The only different or the only advantage for registered user as compared to unregistered user is the ability to check the account. Inside the user account, the records concerning the book which has been borrowed with its detail particulars are displayed. The records of total overdue payment and information of reservation also are displayed in the user account. If the user wants to cancel his/her reservation, simply click the Checkbox. Then, click ‘Cancel’ button to proceed with cancellation.
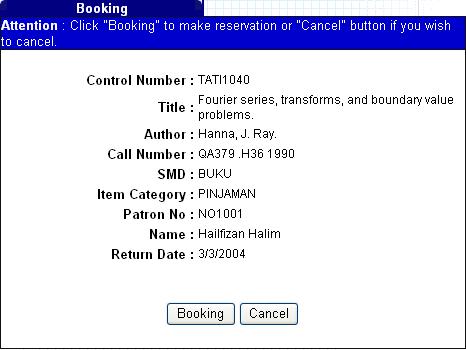
To perform reservation, users are required to search the materials first. When the system found the materials/books to be borrowed, user can proceed for a reservation but only if all of the books are borrowed or all books are not available on the shelves at the specific timeframe. If the books are available, user cannot perform the reservation, so the reservation button is not applicable. For those who are ‘unregistered user’ category, they cannot perform reservation, so the reservation button is not displayed. When user are able to perform reservation, and supposedly they did click the reservation button, the below image will be appear on the screen.
User can click the ‘cancel’ button , if he/she wishes to cancel the reservation, otherwise, continue the reservation process by clicking the ‘Reserve’ button and the screen will appear as below.
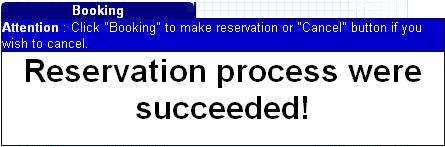
If users successfully perform the reservation, system will send the message to user.
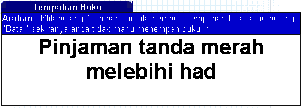
User cannot perform reservation if the number of materials to be reserved exceeds the limit of borrowing quantity. For example, supposedly one user falls in ‘Staff’ category having maximum number of borrowing books is 2 (the actual number is determined by librarian itself). If he performs the reservation for more than two books, system will halt and the following message will be send to him:
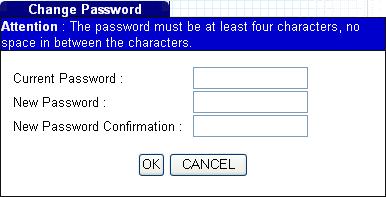
As to systematically secure the user, the Web OPAC system provides a function to change the password in order to secure the credentials of user. If user wants to change his/her password, simply click the ‘Change Password’ button where it is located on the left side of the display area as per diagram 15. The first step is to enter your old password following with new password. The character of the password must not exceed four characters and no space is allowed between the characters. Having entered new password, click ‘Send’ button.
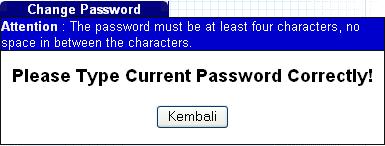
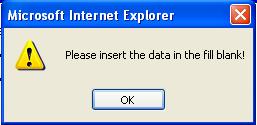
When you enter the wrong old password, the following message will appear on the screen as per diagram 16. All fields need to be filled-up in order to complete the process of changing password. If one or more fields are not filled-up, the following messages will appear as per diagram 17.
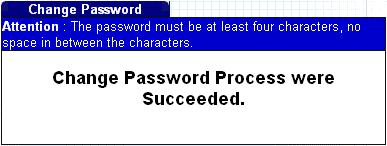
The message “You have successfully change the password” will be displayed upon successfully completing ‘Change Password’ procedures.
‘About Pustakawan’ is providing you the information about Web OPAC. To access the page, simply click the link ‘About Pustakawan’ and the following image will be displayed.
|